|
|
|
Assigning a Case
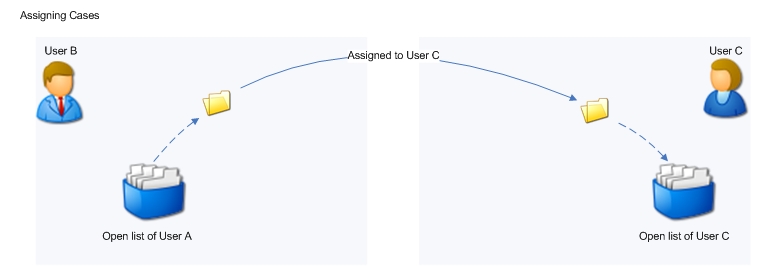
If configured, you can assign a case to another user. Assigning is different from sending because you can only assign a case to another user in your own organisation and assigned cases are not placed in your Sent list. Instead, they are removed from your Open list and placed in the recipient's Open list. This is shown in the following diagram and explained in more detail in Managing Cases.
Note: Any case you assign to another user will simply be removed from your Open list. It will NOT appear in your Sent or Closed list.
Single Cases
- Navigate to the Open list.
- Click
 in the Actions column against the case you wish to assign. A dialog box displays.
- Alternatively, open the case, click at the top of the page.
- Click
 to open your address book.
 - Select a recipient.
- You can read details of how to search for recipients by clicking here
- Select a reason for assigning the case.
- You can select a reason from the Reason for Assign drop-down box or select the Other Reason for Assigning Option button and enter a reason in the text box provided.
- Click:
- to confirm.
- to close the dialog box without sending the case.
Multiple Cases
- Navigate to the Open list.
- Click the tickbox alongside each case you wish to assign. In the following example, 4 have been selected:
- Click from the top of the Case Manager.
- At the prompt, click to assign all selected cases. A dialog box displays.
- Follow steps 3 to 5 above.